If you want to share your Synology RackStation share drive with your Linux Desktop or Server and have it appear as just another folder, you can set the Synology unit to automount on your Linux OS.
NFS-COMMON installation
Definition: nfs-common: NFS support files common to client and server Use this package on any machine that does NFS either as client or server. Programs included: lockd, statd, showmount, and nfsstat. Upstream: SourceForge project “nfs”, CVS module nfs-utils.
Open a Terminal “CTRL+ALT+T” and type this command line:
Debian/Ubuntu
sudo -i

apt-get install nfs-common
or
sudo apt-get install nfs-common
Red Hat / CentOS
su
yum install nfs-common
Find out your IP address on your local network.
ifconfig

Let’s assume your IP on the local network are:
10.129.192.50 and 191.191.191.50 (as shown in the figure).
Synology Login
Login to the Synology RackStation Administration Control Interface and then open the Control Panel.
NFS Privileges
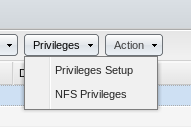
Click on “Shared Folder” which will show you a list of your shared folders. Synology comes with the ability to share folders using the nfs protocol. It is a secure protocol that requires you to add the IP address of the computer that is going to be allowed to access files on the Synology NAS. Once you see the shared folders, select the folder you want to share, then click on “Privileges” and then “NFS Privileges”.
NFS rule
In the next window, click on “Create” and then add the IP address of the computer with which you want to share that folder. You should also decide what privileges you want to grant that computer. If you grant it read/write privileges, that computer can modify files. If you grant it the read privilege, that computer can only read files.
Create Directory
Once you’ve done that, you should be able to access the shared folder over your network. However, what we want to do is make any shared folders automatically mount over the network every time you start your computer. To do so, you’ll need to do two more things. First, create a folder on your computer to map the shared folder to. An ideal location is in your home folder since you already have read/write privileges there. So, for instance, if you are sharing files over the network, create a folder in your home directory called “personal_folder” by doing the following from the terminal
mkdir /home/groups/personal_folder
Edit fstab file
Next, you’ll need to edit your /etc/fstab file. To do so, open a terminal and type:
Debian / Ubuntu
For Desktop
gksu gedit /etc/fstabFor Server
sudo nano /etc/fstabRed Hat / CentOS
For Desktop
su
gedit /etc/fstab
For Server
su
nano /etc/fstab
This should open the /etc/fstab file in a text editing program. You’ll need to add the following lines to your /etc/fstab file:
I like to add a comment line so I know what my command is doing. Here’s the line I add:
#share personal folder
191.191.191.61:/volume1/personal_folders     /home/groups/personal nfs rw,user 0 0
Save the file and close it. or typy “CTRL + o” to save it and “CTRL + x” to close it.
Mount the share drives
Now, assuming you’ve done everything correctly, type the following into a terminal to mount the shared folder:
Debian / Ubuntu
sudo mount -aRed Hat / CentOS
su
mount -a
Your shared folder should now show up in your file explorer (e.g. personal_folder) and should do so every time you start your computer. Depending on the privileges you granted yourself on the Synology NAS, you should be able to read and/or write whatever files you’ve stored on the Synology unit as if they were on your own computer.


