How to Securing your Linux Server

Securing your environment starts during the ordering process when you are deploying server resources. If you want to deploy a quick server without putting it behind an extra hardware firewall layer or deploying it with an APF (Advanced Policy Firewall).

There are a couple of security hardening tips. I  set my servers to have a solid base level of security when I deploy a Linux system.


Limit physical access and booting capabilities

  • Enable BIOS password
  • Disable floppy and usb booting
  • Set a LILO or GRUB password (/etc/lilo.conf or /boot/grub/menu.lst, respectively)
  • check that the LILO or GRUB configuration file is read-protected.


Disable Root Login

When you need super-user permissions, use sudo instead of su. Sudo is more secure than using su: When a user uses sudo to execute root-level commands, all commands are tracked by default in /var/log/secure. Furthermore, users will have to authenticate themselves to run sudo commands for a short period of time.

Note:
You should Stop Using Root!


Partitioning

  • Separate user-writable data, non-system data, and rapidly changing run-time data to their own partitions
  • Set nosuid,noexec,nodev mount options in /etc/fstab on ext2 partitions such as /tmp


Limiting the network access

  • Install and configure ssh (suggest PermitRootLogin No in /etc/ssh, PermitEmptyPasswords No; note other suggestions in text also)
  • Consider disabling or removing in.telnetd
  • Generally, disable gratuitous services in /etc/inetd.conf using update-inetd –disable (or disable inetd altogether, or use a replacement such as xinetd or rlinetd)
  • Disable other gratuitous network services; mail, ftp, DNS, www etc should not be running
  • if you do not need them and monitor them regularly.
  • For those services which you do need, do not just use the most common programs, look for more secure versions shipped with Debian (or from other sources). Whatever you end up running,make sure you understand the risks.
  • Set up chroot jails for outside users and daemons.
  • Configure firewall and tcpwrappers (i.e. hosts_access); note trick for /etc/hosts.deny in text
  • If you run ftp, set up your ftpd server to always run chrooted to the user’s home director
  • If you run X, disable xhost authentication and go with ssh instead; better yet, disable remote X if you can (add -nolisten tcp to the X command line and turn off XDMCP in /etc/X11/xdm/xdm-config by setting the requestPort to 0)
  • Disable outside access to printers
  • Tunnel any IMAP or POP sessions through SSL or ssh; install stunnel if you want to provide this service to remote mail users Set up a loghost and configure other machines to send logs to this host (/etc/syslog.conf)
  • Secure BIND, Sendmail, and other complex daemons (run in a chroot jail; run as non-root pseudo-user)
  • Install snort or a similar logging tool.
  • Do without NIS and RPC if you can (disable portmap).


Password hygiene and login security

  • Do not choose passwords less than 8 characters “Create complexity with upper and lower-case of letters ,Special character and numbers e.g Qu4DL1nux*I0″
  • Enable password shadowing and MD5
  • Install and use PAM – Add MD5 support to PAM and make sure that (generally speaking) entries in /etc/pam.d/ files which grant access to the machine have the second field in the pam.d file set to “requisite” or “required”.
  • Tweak /etc/pam.d/login so as to only permit local root logins.
  • Also mark authorized tty:s in /etc/security/access.conf and generally set up this file to limit root logins as much as possible.
  • Add pam_limits.so if you want to set per-user limits
  • Tweak /etc/pam.d/passwd: set minimum length of passwords higher (6 characters maybe) and enable md5
  • Add group wheel to /etc/group if desired; add pam_wheel.so group=wheel entry to /etc/pam.d/su
    For custom per-user controls, use pam_listfile.so entries where appropriate
  • Have an /etc/pam.d/other file and set it up with tight security
  • Set up limits in /etc/security/limits.conf (note that /etc/limits is not used if you are using PAM)
  • Tighten up /etc/login.defs; also, if you enabled MD5 and/or PAM, make sure you make the corresponding

Note:
Disable root ftp access in /etc/ftpusers
Disable network root login; use su or sudo.

Policy issues

  • Educate users about the whys and hows of your policies. When you have prohibited something which is regularly available on other systems, provide documentation which explains how to accomplish similar results using other, more secure means.
  • Prohibit use of protocols which use cleartext passwords (telnet, rsh and friends; ftp, imap, http)
  • Prohibit programs which use SVGAlib.
  • Use disk quotas.

Update Kernel and Software

Ensure your kernel and software patches are up to date. I like to make sure my Linux kernel and software are always up to date because patches are constantly being released with corrected security flaws and exploits. Remember you have access to SoftLayer’s private network for updates and patches, so you don’t have to expose your server to the public network to get updates. Run this with sudo to get updates in RedHat or CentOS: yum update.

How to mount NFS with Synology RackStation share drive on Linux

If you want to share your Synology RackStation share drive with your Linux Desktop or Server and have it appear as just another folder, you can set the Synology unit to automount on your Linux OS.

NFS-COMMON installation

Definition: nfs-common:  NFS support files common to client and server Use this package on any machine that does NFS either as client or server. Programs included: lockd, statd, showmount, and nfsstat. Upstream: SourceForge project “nfs”, CVS module nfs-utils.

Open a Terminal “CTRL+ALT+T” and type this command line:

Debian/Ubuntu

sudo -i

apt-get install nfs-common

or

sudo apt-get install nfs-common

Red Hat / CentOS

su
yum install nfs-common

Find out your IP address on your local network.

ifconfig

ifconfig

Let’s assume your IP on the local network are:

10.129.192.50 and 191.191.191.50 (as shown in the figure).


Synology Login

Login to the Synology RackStation Administration Control Interface and then open the Control Panel.

synologin sycontrolpanel


NFS Privileges

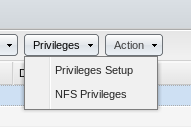
Click on “Shared Folder” which will show you a list of your shared folders.  Synology comes with the ability to share folders using the nfs protocol.  It is a secure protocol that requires you to add the IP address of the computer that is going to be allowed to access files on the Synology NAS.  Once you see the shared folders, select the folder you want to share, then click on “Privileges” and then “NFS Privileges”.

synology-setup-privileges


NFS rule

In the next window, click on “Create” and then add the IP address of the computer with which you want to share that folder.  You should also decide what privileges you want to grant that computer.  If you grant it read/write privileges, that computer can modify files.  If you grant it the read privilege, that computer can only read files.


nfsprivileges


Create Directory

Once you’ve done that, you should be able to access the shared folder over your network.  However, what we want to do is make any shared folders automatically mount over the network every time you start your computer.  To do so, you’ll need to do two more things.  First, create a folder on your computer to map the shared folder to.  An ideal location is in your home folder since you already have read/write privileges there.  So, for instance, if you are sharing files over the network, create a folder in your home directory called “personal_folder” by doing the following from the terminal

mkdir /home/groups/personal_folder


Edit fstab file

Next, you’ll need to edit your /etc/fstab file.  To do so, open a terminal and type:

Debian / Ubuntu

For Desktop

gksu gedit /etc/fstab

For Server

sudo nano /etc/fstab

Red Hat / CentOS

For Desktop

su
gedit /etc/fstab

For Server

su
nano /etc/fstab

fstab

This should open the /etc/fstab file in a text editing program.  You’ll need to add the following lines to your /etc/fstab file:

I like to add a comment line so I know what my command is doing.  Here’s the line I add:

#share personal folder
191.191.191.61:/volume1/personal_folders     /home/groups/personal nfs rw,user 0 0

Save the file and close it. or typy “CTRL + o” to save it and  “CTRL + x” to close it.

Mount the share drives

Now, assuming you’ve done everything correctly, type the following into a terminal to mount the shared folder:

Debian / Ubuntu

sudo mount -a

Red Hat / CentOS

su
mount -a

Your shared folder should now show up in your file explorer (e.g. personal_folder) and should do so every time you start your computer.  Depending on the privileges you granted yourself on the Synology NAS, you should be able to read and/or write whatever files you’ve stored on the Synology unit as if they were on your own computer.

Tutorial netlogon script for window client “netlogon .bat and .vbs”

Window Bat file

@echo off

REM removes any network drives in use by user
@if exist h:  use h: /delete /yes
@if exist g:  use g: /delete /yes
@if exist p:  use p: /delete /yes
@if exist u:  use u: /delete /yes
#repeat this fo any other mapped drives @if exist p: net use p: /delete /yes

REM Maps shares as network drives
start  %LOGONSERVER%\netlogon\logon.vbs

REM WPKG installer
cscript \\pdc\wpkg\wpkg.js /synchronize /quiet

REM Syncronize the time on the workstation to that of the server.
net time %LOGONSERVER% /SET /Y
 

VBscript

First make sure all variables are dimensioned.
This isn’t necessary for functionality; it’s for coding discipline only.


Option Explicit

'dimension all our variables
dim objNetwork
dim strDriveLetter, strRemotePath, strUser, strGrp
dim strGroupADSPath, strUserADSPath, grp
dim objShell, grouplistD, ADSPath, userPath, listGroup
dim objFileSys,  objExecObject
dim arrShares
dim strShare,  strCommandText, strResults
dim arrPrivaryDrives(4)

Const SERVERPATH = "\\devadom\"

On Error Resume Next

'This script will use the MapNetworkDrive method
'for each network drive mapped.

'We'll be using the Wscript.Network Object to enumerate the user as well as to map drives.
'We only need to instantiate it once at the beginning.
Set objNetwork = Wscript.CreateObject("Wscript.Network")

'First let's get the user name since we'll use it for mapping the home directory
'as well as checking group memberships.
strUser = objNetwork.UserName

'In just about every network at least two drives are mapped:
'One for the user's home directory, and one for an organizational public share.
'Set array Primary Drives
arrPrivaryDrives(0) = strUser
arrPrivaryDrives(1) = "public"
arrPrivaryDrives(2) = "transit"

' *****************************************************
'We'll map those first since they don't depend on group memberships.
Function mapPrimaryNetworkDrive()
'PublicShare Drive to P:
strDriveLetter = "P:"
strRemotePath = SERVERPATH & "public"
objNetwork.MapNetworkDrive strDriveLetter, strRemotePath

strDriveLetter = "T:"
strRemotePath = SERVERPATH & "transit"
objNetwork.MapNetworkDrive strDriveLetter, strRemotePath

end Function
' *****************************************************

' *****************************************************
' This function is listing all network drives
Function getNetworkDriveList ()
Set objNetwork = Wscript.CreateObject("Wscript.Network")
Set objFileSys = CreateObject("Scripting.FileSystemObject")
Set objShell = CreateObject("Wscript.Shell")

strCommandText = "net view " & SERVERPATH
strResults=""

Set objExecObject = objShell.Exec(strCommandText)
strCommandText =""

' Loop the object status
Do
WScript.Sleep 60
Loop Until objExecObject.Status <> 0

' Read all object
strResults = objExecObject.StdOut.ReadAll()
arrShares = fetchShareNetworkDrive(strResults)

For Each strShare In arrShares
Call mapNetworkDrive(strShare)
Next

wscript.quit
End Function
' *****************************************************

' *****************************************************
' This function is mapping the network drives
' Parameter string strShare
Function mapNetworkDrive(strShare)

'Find next available drive letter
'TO-DO What if all drive letters are already taken? Add guard to prevent further mapping

strDriveLetter = Asc("c")    'Convert CHAR C to ASCII code
While objFileSys.DriveExists(Chr(strDriveLetter)+":")    'Increase ASCII code index by 1 until free letter is found
strDriveLetter = strDriveLetter+1
Wend

strDriveLetter = Chr(strDriveLetter) + ":"    'Convert ASCII code back to character and concatenate : to it
'Wscript.Echo "The next available drive letter is "+strShare +" :" + strDriveLetter
strRemotePath = SERVERPATH&CStr(strShare)
strRemotePath = CStr(strRemotePath)

objNetwork.MapNetworkDrive strDriveLetter, strRemotePath    'map the drive

End Function
' *****************************************************

' *****************************************************
' This function is feching the shared network drives
' Parameter string
' Return method

Function fetchShareNetworkDrive(str)
'set variables
Dim i    'current position in string
Dim asciiChar    'current string character converted to ascii
Dim startFound, parse 'bool
Dim strShare    'share name
Dim arrayPosition    'position in array of shares
Dim Shares()    'shares array

'init default values
arrayPosition = 0
parse = False
startFound = False

For i = 1 To Len(str)

If (startFound=False) Then
asciiChar = CStr(Asc(Mid(str, i, 1)))+CStr(Asc(Mid(str, i+1, 1)))+CStr(Asc(Mid(str, i+2, 1)))
Else
asciiChar = CStr(Asc(Mid(str, i, 1)))
End If

If (asciiChar = "451310") Then 'match char '-' Line Feed and Carriage Return -> at this stage next char will be first letter of our share name
parse = True    ' allow parsing
startFound = True    'start of share list found set flag to true
i=i+3    'increase i by 3 to skip - LF CR
ElseIf ((asciiChar = "10") And (startFound)) Then    'if current character in Line Feed and we already found start -> start parsing
parse = True
i=i+1
End If

If ((parse)) Then
While((asciiChar <> "32"))    'While character is not ' ' parse chars to out strShare buffer
If(i=Len(str)) Then    'safeguard if we reach end of file
asciiChar="32"
Else
asciiChar = CStr(Asc(Mid(str, i, 1)))
If (asciiChar <> "32") Then 'If character is not whitespace add it
strShare=strShare+ Mid(str, i, 1)
End if
i = i+1
End if
Wend
ReDim Preserve Shares(arrayPosition) 'increase array size
Shares(arrayPosition)= strShare    'add new share to array
arrayPosition = arrayPosition+1
parse=False
End If
strShare =""
Next

ReDim Preserve Shares(arrayPosition-3)    'remove 3 last items of array -> it is rubbish I had no time to tune parser, will do later, works fine anyways
fetchShareNetworkDrive = Shares
End Function
' *****************************************************

' *****************************************************
'This function returns a particular environment variable's value.
' for example, if you use EnvString("username"), it would return
' the value of %username%.
Function EnvString(variable)
variable = "%" & variable & "%"
EnvString = objShell.ExpandEnvironmentStrings(variable)
End Function
' *****************************************************

' *****************************************************
' returns the index of obj in array. obj can be anything.
' Returns false if found.
Function IsNotInArray(strIn, arrCheck)
'IsInArray: Checks for a value inside an array
Dim bFlag
bFlag = True
If IsArray(arrCheck) AND Not IsNull(strIn) Then
Dim i
For i = 0 to UBound(arrCheck)
If LCase(arrcheck(i)) = LCase(strIn) Then
bFlag = False
Exit For
End If
Next
End If
IsNotInArray = bFlag
End Function
' *****************************************************

' Clean up
Set objShell = Nothing

'**********************************
' Main Program              '
'**********************************
mapPrimaryNetworkDrive()
getNetworkDriveList()

How to setup samba configuration file

Samba configuration on a Linux (or other UNIX machine) is controlled by a single file, /etc/smb.conf. This file determines which system resources you want to share with the outside world and what restrictions you wish to place on them.

Since the following sections will address sharing Linux drives and printers with Windows machines, the smb.conf file shown in this section is as simple as you can get, just for introductory purposes.

Don’t worry about the details, yet. Later sections will introduce the major concepts.

Each section of the file starts with a section header such as [global], [homes], [printers], etc.

The [global] section defines a few variables that Samba will use to define sharing for all resources.

The [homes] section allows a remote users to access their (and only their) home directory on the local (Linux) machine). That is, users trying to connect to this share from Windows machines, will be connected to their personal home directories. Note that to do this, they must have an account on the Linux box.

The sample smb.conf file below allows remote users to get to their home directories on the local machine and to write to a temporary directory. For a Windows user to see these shares, the Linux box has to be on the local network. Then the user simply connects a network drive from the Windows File Manager or Windows Explorer.

Note that in the following sections, additional entries for this file will be given to allow more resources to be shared.

[global]

#resolve order
name resolve order = bcast lmhosts host wins

#hostname
netbios name = DEVADOMAIN

#workgroup
workgroup = DEVADOMAIN

#Company name
server string = Your Company Name

# Run a WINS server
wins support = yes
wins server = 191.191.191.14

# Always act as the local master browser
# and domain master browser.  Do not allow
# any other system to take over these roles!

domain master = yes
local master = yes
preferred master = yes
os level = 255

# Perform domain authentication.

security = user
encrypt passwords = true
passdb backend = tdbsam
domain logons = yes

#password path
passwd program = /usr/bin/passwd %u

# The location of user profiles for Windows NT/2000/XP.

logon path = \\%L\profiles\%U\%a

# Users' Windows home directories and storage of Win95/98/Me roaming profiles.
logon drive = H:
follow symlinks = yes

# The following line is optional because
# Samba always offers NetBIOS time service.
# This causes it to also be advertised:

time server = yes

# The logon script used for all users,
# Relative to [netlogon] share directory.
logon script = logon.bat

# The group identifying administrative users.
# If you have domain users in the Domain Admins
# group, use them here instead of "devadmin".
#domain admin group users = root administrator devadmin @smbadmins
admin users = administrator @smbadmins
# For adding machine accounts automatically.
# This example works on Linux. For other host
# operating systems, you might need a different
# command.
add user script = /usr/sbin/useradd -m '%u' -g smbusers -G smbusers

# unix password sync
unix password sync = yes

#system log
syslog = 0

# panic action and change password
panic action = /usr/share/samba/panic-action %d
pam password change = yes
obey pam restrictions = yes

#optional
passwd chat = *Enter\snew\s*\spassword:* %n\n *Retype\snew\s*\spassword:* %n\n *password\supdated\ssuccessfully* .


#locking set to no, for access files
strict locking = no
oplocks = no
blocking locks = no
strict locking = no
locking = no

#printer
printing = cups
show add printer wizard = No
printcap name = cups
printer = 10.129.192.180:9100

#remote announce = 191.191.0.0/191.191.0.255  192.192.0.0/192.192.0.52

#anonym account default disable
guest account = nobody

#sripts
add machine script = /usr/sbin/useradd -s /bin/false -d /nonexistent '%u' -g smbmachines
disable spoolss = Yes
delete user script = /usr/sbin/userdel -r '%u'
add group script = /usr/sbin/groupadd '%g'
socket options = TCP_NODELAY
delete group script = /usr/sbin/groupdel '%g'
add user to group script = /usr/sbin/usermod -G '%g' '%u'

#logs
max log size = 1000
log file = /var/log/samba/samba.log


# This will prevent nmbd to search for NetBIOS names through DNS.
dns proxy = no

#### Networking ####

# The specific set of interfaces / networks to bind to
# This can be either the interface name or an IP address/netmask;
# interface names are normally preferred
interfaces = 127.0.0.0/8 eth1 191.191.0.0/24

# Only bind to the named interfaces and/or networks; you must use the
# 'interfaces' option above to use this.
# It is recommended that you enable this feature if your Samba machine is
# not protected by a firewall or is a firewall itself.  However, this
# option cannot handle dynamic or non-broadcast interfaces correctly.
;    bind interfaces only = yes

# Allow Symlinks
follow symlinks = yes
wide links = yes
unix extensions = no


[netlogon]
comment = Network Logon Service
path = /var/lib/samba/netlogon
browseable = no
read only = no
#valid users = %S
#read only = yes
#valid users = @smbadmins @smbusers

[profiles]
comment = Network Profiles Share
path = /srv/storage/profiles
comment = Network Profiles Share
read only = No
store dos attributes = Yes
create mask = 0600
directory mask = 0700
browseable = no
guest ok = no
printable = no
profile acls = yes
csc policy = disable

[homes]
comment = Home Directory
browseable = no
read only = no
valid users = %S

[print$]
comment = Printer Drivers
path = /var/lib/samba/printers
browseable = yes
read only = yes
guest ok = no
write list = root


[printers]
comment = Printer in Linux
path = /var/spool/samba
guest ok = Yes
printable = Yes
use client driver = Yes
browseable = No


[public]
revalidate = yes
comment = Public shares
writeable = yes
path = /home/public


[group_folder]
write list = @compressor
path = /home/groups/mosusers/compressor
force directory mode = 0770
force create mode = 0770
create mask = 0770
comment = Share folder 
directory mask = 0770
valid users = @compressor
read only = no
oplocks = no
blocking locks = no
strict locking = no
locking = no


[client_softwares]
browseable = no
valid users = @administrator,@mosadmin,@users
path = /home/client_softwares
write list = @administrator

[wpkg]
comment = Windows Packager
path = /var/www/wpkg/wpkg
read only = yes
browseable = no

[transit]
oplocks = no
writeable = yes
locking = no
invalid users = @GROUP
path = /home/groups/transit
strict locking = no
comment = Share Folder
blocking locks = no

How to install Samba as Domain Controller for linux and window clients

A Samba-based Windows PDC (Primary Domain Controller) server (without the Windows) which is configured to support netlogon, network attached storage for domain users, roaming profiles and PnP printing services with an example PDF printing service. Includes a powerful web interface for configuring Samba and printing services.

The TKL PDC is ready to go straight out of the box. A vanilla XP install on the same subnet will join the domain with just a little network configuration…
Before you start…

TurnKey PDC is not an Active Directory replacement: The v12.x (and previous versions) of TKL PDC uses Samba 3. If you’re looking for a Server 200x Active Directory full replacement, this isn’t going to do the job. With this PDC acting as the DC on your network, you’re going to have a NT domain. However if you follow these  instructions then you can add it to your existing AD domain.

Note:
Windows Home versions can’t join a domain: None of the Windows Home versions [Starter (XP, Vista, Win7),  Home (XP), MCE (XP), Home Basic (Vista, Win7), Home Premium (Vista, Win7) or Windows 8 (Windows 8 without a suffix title is the successor to Win7 Home Premium)] are capable of joining a domain. You’ll need to use a ‘professional’ version [Pro (XP, Win8) Business (Vista), Professional (Win7), Enterprise (Vista, Win7, Win8) or Ultimate (Vista, Win7, Win8)].


How to install

Download Turnkey Domain Controller

Burn Turnkey ISO to a CD/DVD or Flash drive and boot from the ISO.

Replacement-PDC-Test-2012-02-20-13-05-58

  1. Use Arrow keys select the option “Install into disk” and press Enter.
  2. Select the partition type. In this example we select: “Guide – use entire disk and set up LVM”.
  3. Click Yes to continue
  4. Enter the amount of volume to use for guided partitioning. Select OK and press Enter.
  5. Select Yes and press Enter.
  6. Install the GRUB boot loader to the master boot record, Select Yes and press Enter.
  7. The installation is complete. Click Yes to reboot the system.

Configuration

  1. After reboot, we need to configure our system.
  2. Enter the new password for user root. You have to enter the same password again to confirm.
  3. Next step, Enter the password for AjaxXplorer local admin account. You can use the same password of root user or different.
  4. Enter the domain you want to use.
  5. Enter the password for Samba administrator.
  6. TurnKey Backup and Migration, We skip this for step. We also can configure this step later.
  7. Install the security update for the following step required. and we will get the summary of our services setup.
  8. Set a static IP for server, by select on Advanced Menu and press Enter
  9. Select on Networking –> Static IP  press Enter, and configure the Static IP as our wish. In this example will be 192.168.5.200
  10. And then click on Back –> Reboot –> Select.
  11. Reboot the appliance Yes. After reboot we get our system with our static IP.

We can access to use our services via web with different ports:

Web: http://192.168.5.200
CUPS admin: https://192.168.5.200:631
Web shell: https://192.168.5.200:12320
Webmin: https://192.168.5.200:12321
File Manager: https://192.168.5.200:files
SMB/CISFS: \192.168.5.200 (ports 139/445)
SSH/SFTP root@192.168.5.200 (port)

23

Access our TurnKey Domain Controller via Web

24

That’s all about now. You can manage your own Samba domain controller via web browser. Create users,groups and shares depend your Organization structures.


Setting Up

Build your TKL PDC or get the VM up and running (e.g., VirtualBox installation tutorial). You should set up the network address, PDC name, domain name and root password before you do anything else. DO NOT TRY TO CREATE ANY WINDOWS USERS AT THIS POINT.

You can set the PDC IP on the config console when the machine boots up. To set the PDC and Domain names, fire up a browser, point it a the PDC address and select the Samba icon. After you’ve logged in, you can change the domain and PDC settings via the ‘Windows Networking’ icon.

On the XP client networking settings, set the WINS address to the PDC IP. NT domains rely heavily on NETBIOS so you don’t need to worry about DNS.

Make sure you can ping the PDC from the client and vice versa to prove the network configuration. Ping by IP and by name to ensure that everything appears as expected.

If you are using a VirtualBox XP build for testing and you can’t join the domain, you probably have a network misconfiguration. The default network setting for VirtualBox machines is NAT, this won’t work. You need to bridge the virtual network to your physical network. Take a look at the network settings on the TKL PDC virtual machine, it’s set up with bridging by default.


Joining the Domain

Log on to the client with the local admin account and:

  • Right click ‘My Computer’ and select ‘Properties’
  • Select the ‘Computer Name’ tab on the system properties dialog.
  • Selecting the ‘Change’ button brings up the computer name changes dialog.
  • Select the ‘Domain’ option and type the name of your domain into the text box.

If all is well, you should be prompted for a username and password to join the domain. Enter the Samba username ‘administrator’ and the password (‘turnkey’ is the default).

If all is well, you should get a short wait followed by a ‘Welcome to the domain’ message. Once the client is rebooted, you can log on with the Samba administrator account (remember to select the domain at the logon prompt).

Adding Users

Now you can create domain/Samba users on the PDC, they will be automagically be available for logon on the client. There are a few gotchas with creating users, groups and policies, but that’s beyond the scope of this guide.

If you are getting an error message such as “windows cannot locate server copy roaming profile” on login, then please ensure that your Linux user is in the Linux group “smbuser” and that Linux users and Samba users are synced.


Tutorial Samba config & Netlogon Scripts

Tutorial samba configuration file

Tutorial netlogon script for window client “netlogon.vbs”